You must take screenshots at work to communicate ideas, share error screens with others, and quickly share project progress. You may also need to take screenshots for specific jobs. As a writer, for example, I must take screenshots to show my readers what I’m talking about. This article explores the Best Screen Capture Tools for Windows.
You may need to take screenshots even when you are not using your screen. You might need to take a screenshot when you buy something on Facebook.
Although it is easy to take screenshots with Windows (just press the Windows+PrtScn buttons), there are few options. It lacks an extensive editing tool, is not fully automated, and can make taking screenshots in various ways difficult.
A third-party software program that can take screenshots is essential if you are a frequent program user. This software can take multiple screenshots, save them automatically online or offline, and then annotate them using powerful editing tools.
Here are some top Windows screenshot software options to help you choose the right one.
Best Screen Capture Tools for Windows
Snagit

Snagit offers a premium recording and screenshot tool. You can try it for free for 15 days. It is very powerful in taking and editing screenshots and sharing them. There are 12 options for taking screenshots. Each option has additional settings that can be adjusted to alter the behavior.
Snagit editor opens the taken screenshots. It offers all of the editing tools and a gallery that allows you to view all your screenshots together in one place. You can also access a list of websites offering images and cloud storage to instantly share your screenshots.
You can buy the latest version of Snagit after the free 15-day trial for $49.99.
Greenshot
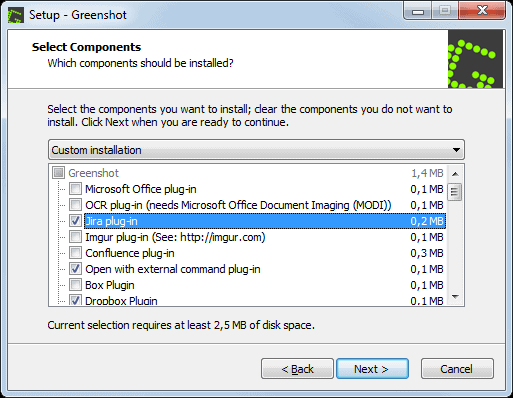
Greenshot is my favorite choice for a powerful, simple, and free screenshot tool. This open-source app allows you to take screenshots in many ways quickly. You can capture the region, active windows, last region, and many other screenshots with keyboard shortcuts and UI.
It can be configured to save screenshots to a folder or send them to a particular program. You can also upload your screenshots directly to Imgur right after you have taken them. It is also very light on resources and can be used from the taskbar to cause minimal interruption to your work.
PicPick
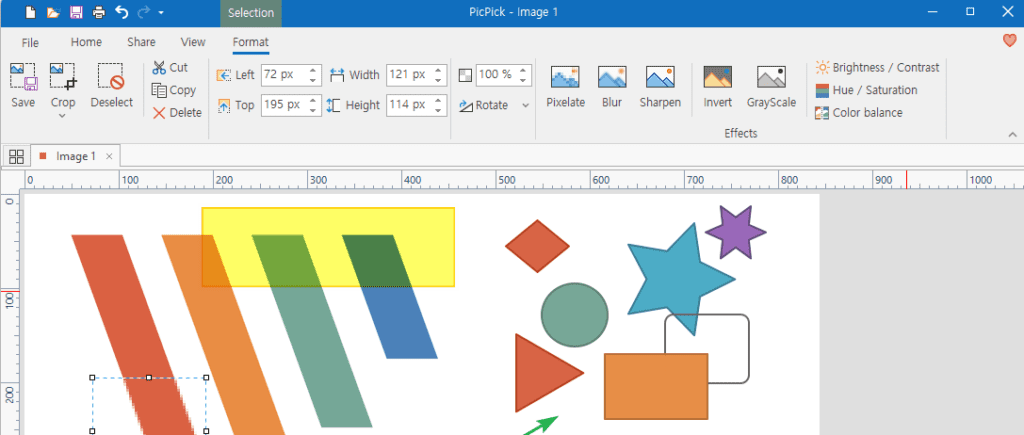
I have used PicPick for almost two years. I moved to Greenshot because I needed something simpler. PicPick is a great screenshot tool with a powerful editor. PicPick offers eight different ways to take a screenshot and then allows you to open it in the editor.
You can edit images using the editor. It offers all the usual features, such as annotations, effects, pixel ruler, crop/resize, draw, and many more. PicPick allows you to view and edit all the screenshots that have been taken. You can also share them online via the Share tab.
PicPick is free to use for personal purposes, but no customer support exists. For commercial use, you will need to purchase the paid edition.
ShareX
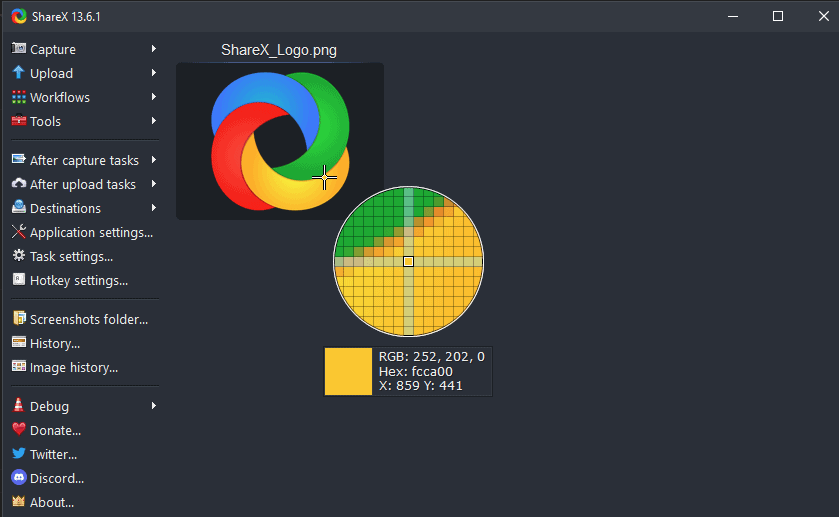
ShareX lets you share your screenshots with people and websites. You can capture screenshots in 7 different ways. Additionally, you can record videos or GIFs. You can also use the auto-capture feature to automatically capture screenshots after a certain time period.
ShareX provides dedicated menus allowing you to upload screenshots directly to various online services. You can also manage their accounts from the ShareX interface. For easy sharing, you can also download shareable short links.
The app is customizable enough to be overwhelming. There are also some tools like an OCR tool.
ScreenRec
It is both a screen capture tool and a screen recording. However, I will be focusing on the screenshot tool. ScreenRec is located on the right-hand side of your screen. It allows you to quickly capture a screenshot. However, you will need to manually choose a region where you want to capture a screenshot.
The screenshot will be opened in a minimal editor. Here you can add text and arrows to the image and then save it. You can view and manage all of your recordings and screenshots in the tool’s gallery. Sign up for the free account to get 2GB of free cloud storage and private, shareable links to your screenshots.
Although it’s free, you can only store limited data in the cloud. You must also sign up for online features.
Gyazo
Gyazo can be used as both a photo editor and a screenshot tool. All screenshots are uploaded immediately to Gyazo’s website using a special link. This link can be shared with anyone to share the screenshots or collaborate.
The free version can only be used to take screenshots and share them online. The Gyazo Pro edition ($3.99/month), which offers unlimited access to saved screenshots as well as editing tools, is the best choice if you want to manage all your online activities. You can also record video and game replays online and manage them.
Amazing Screenshot
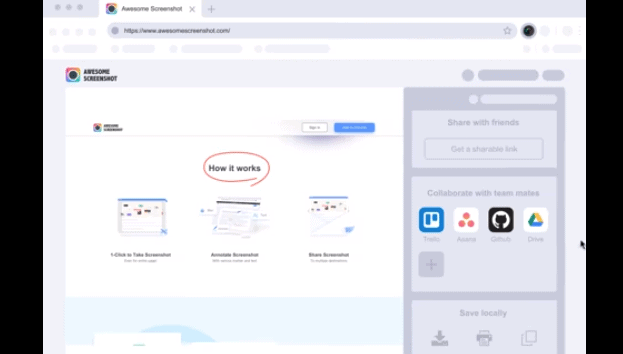
A Chrome extension may be more suitable for you if you take screenshots mostly in Chrome and other apps or if you don’t want to use Windows’s screenshot installer. Awesome Screenshot allows you to take screenshots from Chrome and other apps using your browser.
There are many ways to take screenshots. Once you have taken them, you can edit them in a new tab using some basic editing tools. After editing, screenshots can be shared online via built-in links to sites or uploaded to Awesome Screenshot cloud storage. You can upload screenshots to Awesome Screenshot cloud storage, which allows you to share them privately. Also, you can manage the images online.
Awesome Screenshot allows you to take full-page screenshots of web pages without having to scroll down.
To access additional editing tools and cloud storage, you will need the Pro version.
Nimbus Capture
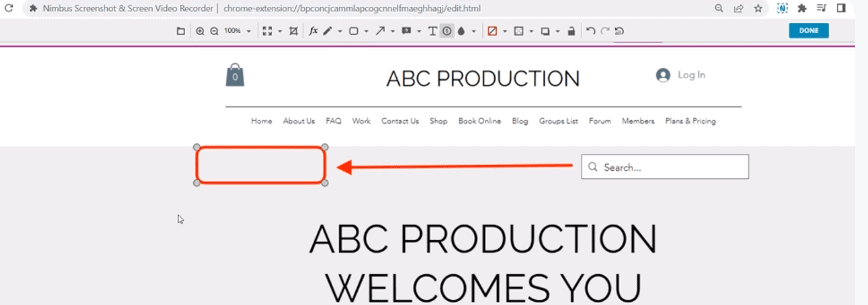
Nimbus Capture allows you to take screenshots, record videos, and create GIFs. It is simple to use and does the job quickly. Although a Pro subscription is required to access its GIF-making and video-recording features, the screenshot feature can be used for free.
You can either take full-screen or region screenshots. Its after-screenshot behavior is what I liked the most. The widget immediately opens and allows you to annotate the screen, download it/share it, and even make annotations. You can also upload the screenshots to the Nimbus Capture online account. There, you can add notes or manage them.
Screenpresso
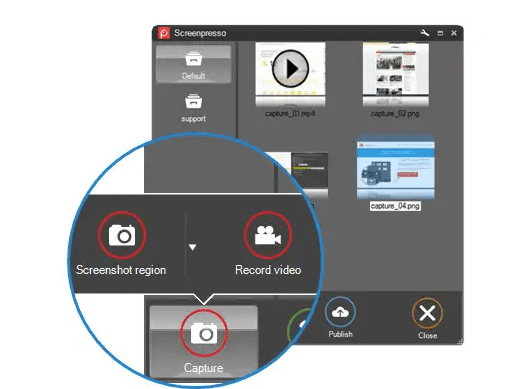
Screenpresso places a small widget at the top and you can hover over it to bring it out. This widget can be used to take regular and delayed screenshots, as well as scrolling screenshots. A color picker tool can be used from the same widget to create OCR images.
Screenpresso has a cool feature that automatically adds preset effects and watermarks,s and resizes screenshots right after they are taken. Even better, you can change the background of your desktop only after a screenshot has been taken.
The majority of screenshot-related functions are free. However, the Pro version offers OCR and video recording with no watermark.
Windows Snipping Tool
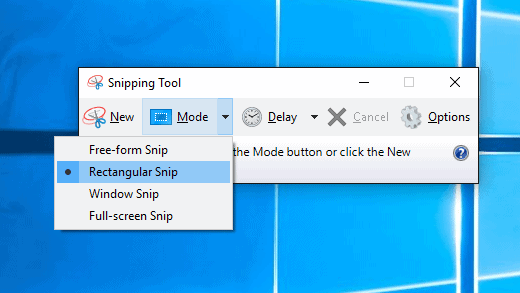
Windows has a built-in tool that is very powerful and easy to use. For most practical purposes, it is all you really need. In earlier versions of Windows, it was always very present in your start menu accessories. However, in Windows 11, it is still there but a bit more hidden. You can select Search and enter ‘Snipping Tool’, and you’ll see the faithful icon to open the app. Otherwise, you click the Windows Logo Key + Shift + S.